
Translated by AI. This article was originally written in French and translated by Claude, Anthropic’s AI. The French original remains the reference version.
Building a fully open-source infrastructure was marked by a search for “quick wins”, those small early victories that strengthen the conviction that you have chosen the right approach. My journey began with inspiration from an article by Larry Sanger, co-founder of Wikipedia, in which he shared his thoughts on privacy and digital hygiene.
However, to consolidate my first steps, I cross-checked this information with other trusted sources in order to build a solid foundation for my open-source infrastructure. Here are some of the most influential resources that guided my choices.
🥼 Reference websites for homelabbing and privacy-oriented tools

This website has become a reference for online privacy protection. Regularly updated, it offers a multitude of tools and recommendations for all kinds of use cases, from secure web browsing to password management and email privacy. It has become an essential starting point for anyone who wants to strengthen their online privacy.
Optimize your Homelab capabilities through self-hosting and utilizing open-source solutions
ServeTheHome is the IT professional’s guide to servers, storage, networking and high-end workstation hardware, as well as great open-source projects.
This website aims to provide a friendly resource with tips, troubleshooting advice and shared experiences to help others build their own advanced home networks.
📹 YouTube channels dedicated to homelabbing:

Techno Tim has become an invaluable source of information on building a homelab, offering practical guides and demonstrations of open-source technologies.
NetworkChuck explores a wide range of technology topics, including open-source solutions for networks and servers.

Wolfgang dives into the technical side of homelabbing, providing detailed information on using open-source tools.

Christian Lempa’s channel focuses on self-hosted IT infrastructure, exploring open-source solutions to improve your personal digital life.

AdrienLinuxtricks is a YouTube channel focused on Linux and open-source software. You will find tutorials, tips, Linux distribution reviews and guides to get the most out of open-source technologies. It is ideal for Linux enthusiasts, beginners and experienced users alike, who want to explore and master the open-source world.

ChrisTitusTech is a YouTube channel covering a wide range of technology topics, from computing to software, productivity tips and hardware reviews. The host, Chris, shares his expertise in an accessible way, with practical guides and recommendations. The channel suits anyone interested in technology who is looking for advice and information on various IT topics.
Drawing on these resources, I was able to lay the foundations of my open-source infrastructure and strengthen my understanding of the tools and practices that protect my privacy and security online. These first steps helped me build a solid base for the rest of my journey towards using open-source tools exclusively, focused on privacy, transparency and innovation.
🌐 Using an open-source web browser
The first step of my journey towards an open-source digital experience was finding an alternative to Google Chrome. Although Chrome is a popular and efficient browser, I was increasingly aware of the concerns around privacy and data collection. So I set out to find an open-source solution that could meet my web browsing needs.
After thorough research, Mozilla Firefox quickly became my browser of choice. Mozilla, as a non-profit organization, is firmly committed to protecting online privacy. Firefox is an open-source browser that embodies these values, offering full transparency about its source code and its philosophy of openness. It was a perfect fit for my open-source approach.
To manage my passwords, I chose the Bitwarden extension, an open-source password manager. Bitwarden’s advantage is that it works with my self-hosted Bitwarden installation on my NAS server. This integration lets me manage my passwords securely and store them locally, strengthening my online security.
As for filtering websites, ads and malware, I delegated that task to my OPNsense router. This open-source router comes with a DNS module based on filter lists, similar to a Pi-hole. It lets me actively block ads, trackers and malicious websites centrally, protecting every device on my home network. This strengthens not only my privacy, but also the security of my online activities.
📫 Using a privacy-respecting email service
Email was one of the first areas I wanted to tackle. Choosing the right email service is crucial, since it affects the confidentiality of communications and the security of personal data.
I paid particular attention to several aspects in my search for a privacy-respecting email service:
Content monetization: one of my main concerns was to avoid email providers that monetize their users’ content. Many large email platforms generate revenue by analyzing email content and displaying targeted ads. This practice goes against my values of privacy and confidentiality.
Encryption at the source: email encryption is essential to prevent any unauthorized interception of messages. I looked for a provider that encrypts emails from the start, ensuring that only the sender and the recipient can access the content. Encryption at the source is a fundamental element of confidential communications.
Hosted in Europe: as a privacy-conscious user, the location of the mail servers matters a great deal. I chose an email service hosted in Europe, which means strict data protection and privacy standards apply. This adds an extra layer of security to my communications.
Avoiding vendor lock-in: being tied to a single email provider went against my vision of an open and flexible digital environment. I looked for a provider that does not lock you into a proprietary ecosystem, so that I can migrate to other services if needed.
Among the options available to me:
Self-host my own mail server: tricky to configure, since it relies on security and anti-spam technologies I know little about :) Mail delivery also requires a reliable connection available 365 days a year (or a relay gateway, which is usually paid).
Use a paid solution from a third-party provider.
I use email very little and what I receive is not critical, so I decided to compromise, make my life easier and choose a provider that seems reliable and meets the criteria above.
After looking at many options, I finally chose Soverin.net as my email provider. Although Soverin.net is not necessarily perfect, it addresses several of my core concerns. It does not monetize the content of my emails, offers strong encryption, is hosted in Europe and does not “lock” me into a proprietary ecosystem.
This approach to email is part of my overall commitment to privacy and to promoting open source. It keeps my communications confidential, secure and under my control, while avoiding the intrusive practices and restrictions often associated with traditional email providers. On my journey towards using open-source tools exclusively, this decision reflects my commitment to computer privacy and digital hygiene.
The service is paid (around €25/$25 a year), but it is an easy first step in my approach.
🚧 Taking control of my data by hosting my own NAS server: the beginning of homelabbing
My journey towards a fully open-source infrastructure also led me to rethink how I store and manage my data. Initially, I used a proprietary NAS solution from Synology. Although it offered a degree of stability, I quickly realized its limits. The environment was underpowered, and adding extra services was often complicated, if not impossible.
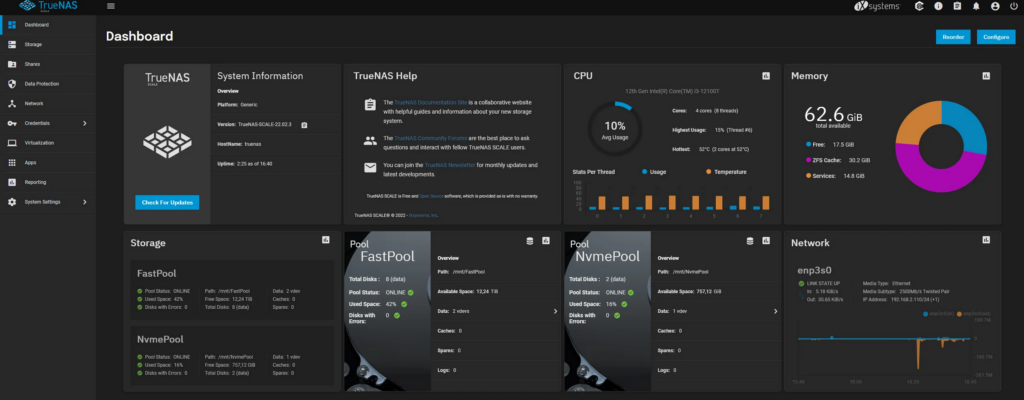
So I started looking for alternatives, considering various open-source solutions. I explored options such as TrueNAS Core, OpenMediaVault and Unraid, each with its pros and cons. After a thorough analysis, I finally chose TrueNAS Scale, a solution built on Debian, which I cherish for its openness and stability.
TrueNAS Scale won me over with its ZFS-based storage. This file system offers many advantages, including snapshots, robustness, data deduplication and compression. These features are essential to guarantee the integrity of my data while making the most of storage space.
One of TrueNAS Scale’s strengths is its application catalog, which offers a variety of services, all in a containerized environment. I can choose between Docker and Kubernetes to deploy and manage my applications. TrueNAS Scale also includes a KVM-based hypervisor, which in my opinion remains a safe bet for virtualization.
Thanks to TrueNAS Scale, my NAS server now hosts a set of applications that are essential to my digital life. Nextcloud lets me store and sync my files securely, PhotoPrism keeps my photo collection organized, Plex gives me access to my media library, and Bitwarden takes care of my passwords securely.
However, I decided not to centralize everything on my NAS server. Critical IT services, such as the OPNsense router, the HAProxy reverse proxy, Let’s Encrypt certificate management, and all the services that secure my network and access to applications, run on dedicated hardware. This approach ensures these crucial components are managed efficiently and strengthens the security of my network. In the following chapters, I will go into more detail about setting up these essential services.
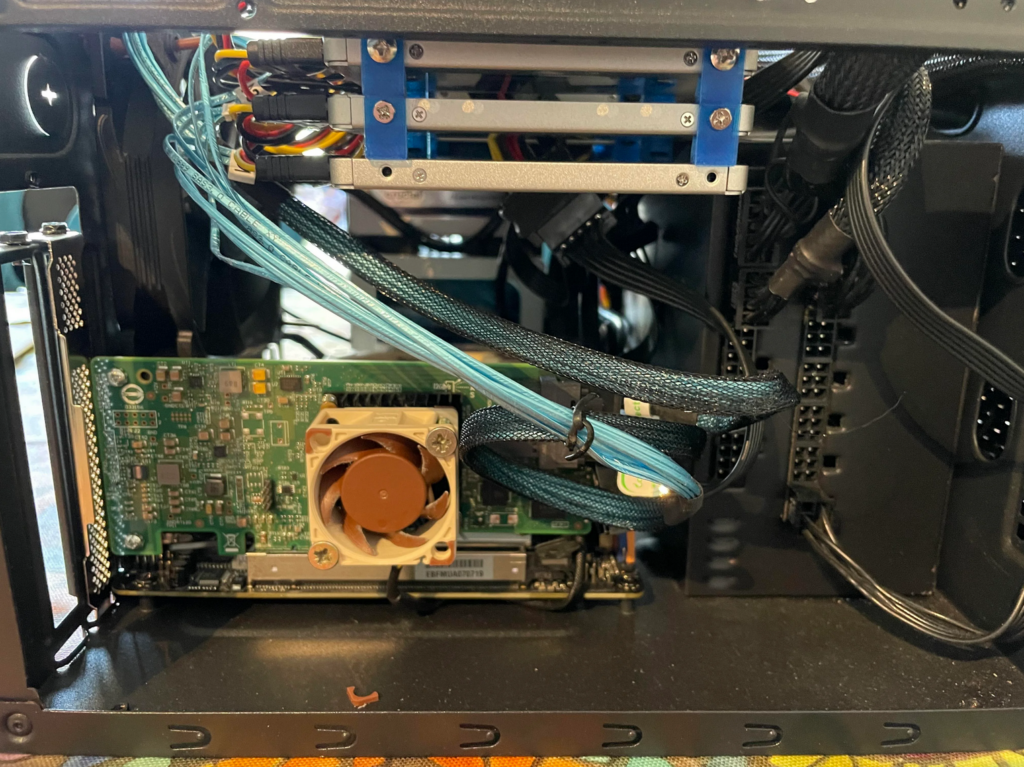
Here is the configuration I chose to reach my goal:
Case: Kolink Satellite
CPU: Intel 12100T
Motherboard: ASRock Z690M-ITX/ax
RAM: 2x 32GB Crucial
Boot storage (boot-pool): 2 x 500GB Crucial MX500 SSD
Main storage (data): 8 x 4TB Crucial MX500 SSD + LSI HBA 9300-8i
Secondary storage (applications): 2 x 1TB Crucial P5 NVMe SSD

The outside
The inside
🔑 Practicing good password hygiene and hosting passwords on my own infrastructure
Like many of us, I once used the same password for most of the online services I signed up for. Although common, this practice carries considerable risks for online security. Becoming aware of these dangers pushed me to look for safer and more efficient ways to manage my passwords.
My first attempt to fix this was to use the password managers built into web browsers. Over time, however, I realized that I could not fully trust them, especially when it came to the security and control of my sensitive data.
So I adopted KeePass, an open-source password manager. KeePass served me for years, offering a secure way to store my passwords. I even stored my KeePass database in the cloud, which let me access my passwords from any of my devices.
Over time, however, I found the KeePass approach increasingly tedious. Managing local databases and syncing them between devices took considerable effort. That is when I seriously considered Bitwarden, an open-source password manager offering a smoother and more flexible solution.
One of Bitwarden’s key advantages is the ability to self-host your own password server. This option let me keep full control of my sensitive data, without having to trust third parties. Bitwarden apps are available for a wide range of operating systems, from desktop to mobile, which makes managing passwords across all my devices much easier. These apps are also designed to stay secure even when offline, by caching and encrypting my password database.
The TrueNAS application catalog also offers Vaultwarden, a community-maintained alternative implementation of Bitwarden. I have used this service since 2019 without any major issue. My passwords are stored securely and easy to access. This approach to password hygiene and self-hosting has been an essential part of my journey towards a more secure and transparent digital experience. It shows that open-source solutions can offer robust and flexible alternatives for online security needs that keep evolving over the years.
📆 Taking back control of my contacts and calendar
My career led me to work in the Digital Workplace field, where collaboration, tool adoption and communication are key pillars of collective success. In that context, I worked with systems such as Google Workspace and Microsoft 365, which offer a full range of productivity and collaboration tools. Alongside these industry giants, I also discovered a smaller player, Nextcloud, which aims to compete with them by offering an open-source, self-hosted alternative.
My curiosity pushed me to explore it, even though in its early versions Nextcloud could be tricky to install and maintain. My goal was clear: take back control of my contacts, my calendar and my data, and free myself from closed ecosystems such as Google Drive and Google Docs.
Several years have passed since my first steps with Nextcloud, and the platform has evolved considerably. It now offers several installation methods, making it more accessible to home users. It works with many NAS systems, proprietary or open source. Personally, I chose a Nextcloud All-in-One installation in a virtual machine, which provides all the services I need.
My personal Nextcloud includes a mail client, a CalDAV-compatible calendar, a CardDAV-compatible contact list, note-taking tools, a Kanban board, a Doodle-like scheduling feature and, above all, a file manager. That last point is essential, because it lets me access my information from home, on the move, or while collaborating with other people.
Nextcloud also offers an iOS client that automatically uploads all my photos to my Nextcloud server. This adds an extra layer of security by making sure my memories are stored privately on my own server.
Nextcloud also comes with a built-in word processor, spreadsheet and presentation tool, allowing several people to work on the same document at the same time while keeping control of our data. Using Nextcloud has become a habit in my family: everyone uses it to collaborate and access their files remotely. This move to a self-hosted open-source solution has strengthened my confidence in how my personal data is managed, while offering a smooth and secure collaboration experience.
🛂 Building a reliable and secure network
By default, a home network is often poorly secured and offers few features to make self-hosting easier. So when I decided to self-host my services, I quickly understood that I would have to handle every aspect of connectivity, security and making my services available online.
Self-hosting means making your services available on the Internet while keeping them secure. That is when I started looking for a global solution to manage all of these aspects, including DNS, DHCP, security and a VPN.
After testing various products, including routers from ASUS, MikroTik and pfSense, I finally chose OPNsense. OPNsense is an open-source router/firewall that offers additional packages to enable the features I needed. Its flexibility and customization options convinced me.
PhasedLogix has an excellent playlist to get started with it. He is clear and knows how to make a rather austere solution accessible 🥇 Learn OPNSense Firewall

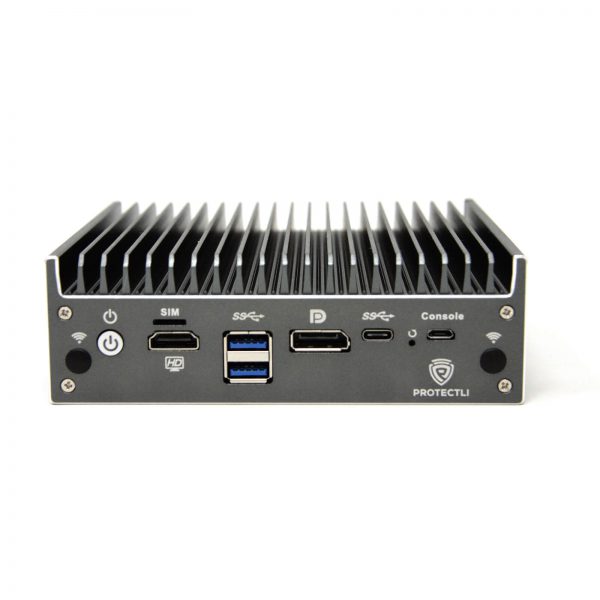
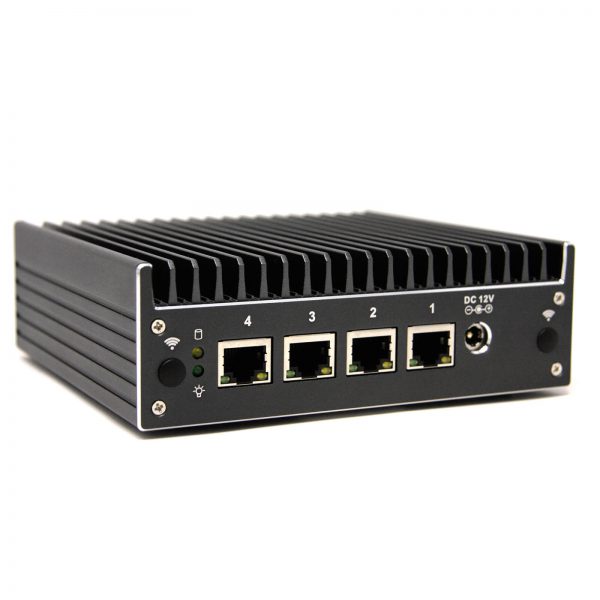
To ensure my network is reliable and secure, I chose to install OPNsense on bare-metal hardware, meaning the software runs directly on dedicated hardware rather than in a virtual machine. This decision was crucial, because the router/firewall plays an essential role in the security of my network. Among the options available, I chose hardware from Protectli, which offers quality products with an open-source BIOS, coreboot, in line with my open-source philosophy.
Front
Back
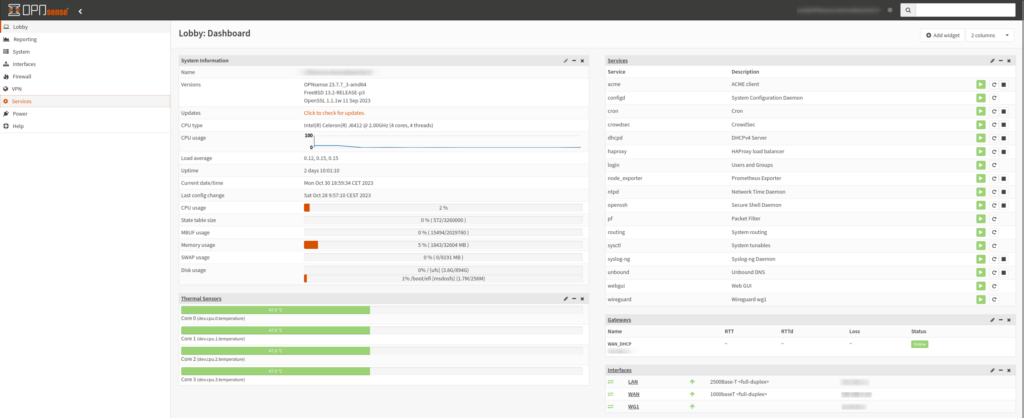
Dashboard
Exposing my services on the Internet requires a domain name, with subdomains to make each service individually accessible. To handle this, I set up an HAProxy reverse proxy, which routes requests to the right service based on the subdomain.
Managing SSL/TLS certificates is essential to secure connections. Fortunately, there is a free certificate authority, Let’s Encrypt, which issues SSL/TLS certificates automatically. OPNsense makes this easy with its ACME plugin, which automatically renews certificates, wildcard or not, for all my subdomains. So every service, whether Nextcloud, Bitwarden, Plex or many others, is accessible through a secure subdomain.
Internal DNS also plays a key role in resolving domain names inside my network. I chose to use the Unbound service on OPNsense, with lists that filter unwanted domains, similar to Pi-hole. The result is browsing without ads or intrusive pop-ups across my entire home network.
Building a reliable and secure network thus became an essential part of my journey towards an open-source digital experience, ensuring that my services are securely accessible both from inside and outside my home network.
I really like the way Techno Tim explains homelab security in such an accessible way. He covers firewalls, reverse proxies, network segmentation and more.
🌳 Watching my environmental footprint with a green-labbing approach
When you start self-hosting your services, it is important to consider the environmental impact. Setting up a personal infrastructure means electricity consumption and spending on IT hardware, which must be balanced with an environmentally responsible approach.
With this in mind, I designed my self-hosting setup with energy efficiency and durability in mind. Each device I use was chosen for its low power consumption and longevity. Combining these two factors allowed me to minimize the environmental impact of my infrastructure.
All three of my devices together consume only 60 watts, the equivalent of an old-generation light bulb. This low consumption is the result of carefully selecting and sizing the hardware to deliver optimal performance while limiting energy use.
Some of my devices were also deliberately oversized to extend their lifespan and keep them compatible with future technologies. This technology-agnostic approach avoids frequent device replacements, reducing electronic waste.
A concrete example is how I handle my wired and Wi-Fi networks. I deliberately separated the two devices, the router and the Wi-Fi access point, because Wi-Fi standards evolve quickly. When the next generation of Wi-Fi arrives, I will only need to replace the access point, keeping my router and avoiding an unnecessary replacement of all the equipment.
By paying attention to the environmental impact of my self-hosting approach, I try to reconcile the benefits of controlling my data and services with a commitment to sustainability and to reducing my environmental footprint. This is the philosophy of green-labbing: combining technology and respect for the planet for more responsible computing.
Interesting resources on the topic: